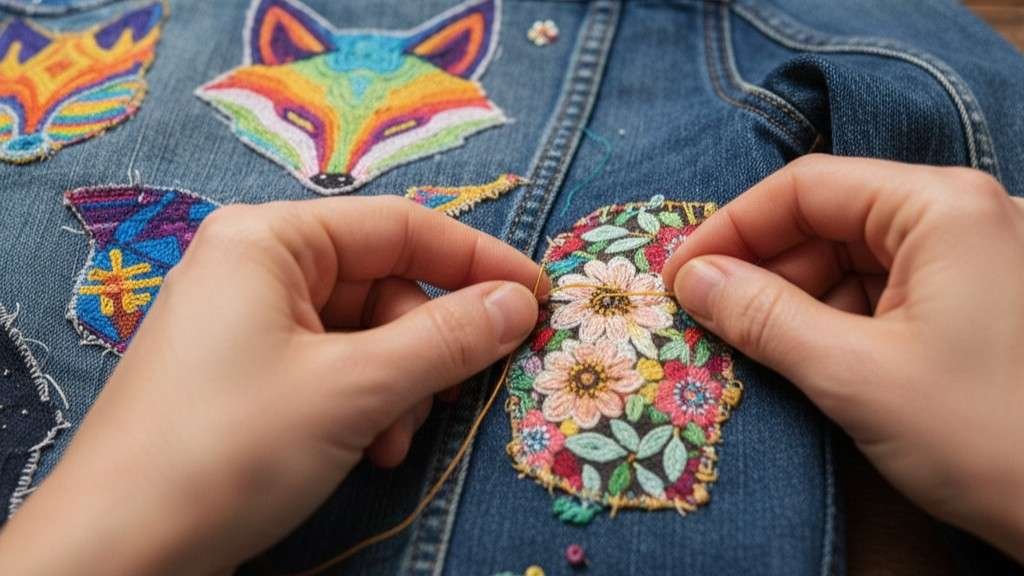
Sewing on cloth patches isn’t just a functional way to repair your clothes—it’s a fantastic opportunity to personalize your wardrobe and add your own creative touch. Whether you’re fixing a hole in your favorite jacket or looking to make a fashion statement, learning how to sew on cloth patches is a skill worth mastering.
Let me tell you, I was once that person who thought this was too complicated, but after a couple of tries, I realized it’s a fun, easy way to spruce up old clothes and give them a fresh, stylish look. Plus, you can get as creative as you like with the designs!
What Materials Do I Need to Sew on Cloth Patches?
Before you start sewing, it’s important to gather the right materials. The process is simple, but choosing the right tools and fabric will ensure your patch stays securely in place and looks amazing.

Patch and Garment
Make sure both the patch and the garment you’re working on are clean and pressed. Wrinkles or uneven surfaces can cause your patch to bunch up after washing, which will ruin the look. A smooth base will help your stitches stay neat and even.
Needle
For thick patches or fabrics like denim, a heavy-duty needle works best. If you’re working with a lighter fabric, a standard needle will suffice. Just make sure it’s appropriate for the material you’re sewing through.
Thread
Choose a strong thread—polyester thread is a great option for durability, but if you want a more rugged look, you can use dental floss for extra strength. Pick a color that matches the patch or contrasts for a bold effect.
Temporary Adhesive
To keep your patch in place while sewing, you can use pins, double-sided tape, or a small amount of fabric glue. If your patch is iron-on, you can press it down first to hold it temporarily, making sewing easier.
Tools
A thimble can be really helpful when working with thick materials. It will protect your fingers and make it easier to push the needle through layers of fabric.
How Do I Sew on Cloth Patches by Hand?
Hand sewing gives you more control over the process, especially when you’re dealing with small, intricate patches or tough-to-reach spots like pockets. Whether you’re going for a subtle look or something more eye-catching, hand stitching allows for precision and a personal touch.
Position the Patch
Start by deciding where you want the patch to go on your garment. Once you’ve settled on the placement, secure it temporarily with pins or fabric glue. This will keep the patch from shifting while you sew.
Thread the Needle
Cut a length of thread—about 18 inches is ideal—and thread your needle. Tie a knot at the end of the thread. It’s essential to double the thread to ensure durability. Begin stitching from the inside of the garment so that the knot is hidden.
Stitch Around the Edge
There are two main types of sewing stitches you can use: the whip stitch and the backstitch.
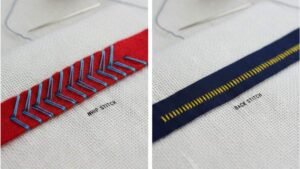
- Whip Stitch: Bring the needle up through the fabric close to the patch’s edge, then down through the patch and fabric a short distance away. Keep your stitches small, even, and perpendicular to the edge for a clean finish.
- Backstitch: Start by bringing the needle through the patch and fabric, then insert the needle slightly behind the first stitch and bring it up a stitch length ahead. This creates a solid line of stitches.
Secure the Thread
Once you’ve sewn all the way around the patch, tie a double knot on the inside of the garment to secure the thread. Trim any excess thread to tidy up your work.
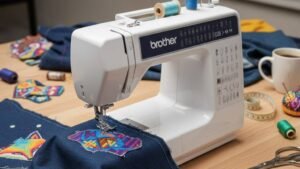
How Do I Sew on Cloth Patches Using a Sewing Machine?
Machine sewing is faster and often results in a stronger hold, making it the ideal option for those who want quick, long-lasting results. Plus, a sewing machine can help you cover more ground and ensure your stitches are even.
Position and Secure the Patch
Just like with hand sewing, start by placing the patch where you want it. You can secure it with temporary adhesive or by ironing it down if it’s an iron-on patch. Make sure everything is lined up before you begin stitching.
Set Up Your Sewing Machine
For machine sewing, it’s essential to use a heavy-duty needle (size 90/14 works well). Choose a stitch type—narrow zigzag stitches are great for covering the raw edges of the patch and blending them in. Alternatively, a straight stitch can work if you stay just inside the patch’s border. Set your machine to a medium or small stitch length for the best results.
Sew the Patch
Slowly guide the fabric through the sewing machine, making sure to sew all the way around the edge of the patch. Using a clear presser foot can help you see exactly where you’re stitching, ensuring your lines are straight and consistent.
Finish the Stitching
Once you’ve sewn all around the patch, overlap the starting stitches to secure the thread. Alternatively, leave long thread tails and tie them off at the back of the garment before trimming the excess.
Frequently Asked Questions About Sewing on Cloth Patches
1. Can I sew a patch on stretchy fabric?
Yes, you can! Sewing on a patch works well on stretchy fabrics like jerseys, but it’s important to use the right needle and thread. A ballpoint needle will help prevent damage to the fabric, and you should use a stretch-friendly thread to ensure your patch stays securely attached after washing.
2. How do I prevent my patch from peeling off?
To prevent your patch from peeling off, be sure to sew it on securely and use durable thread. For extra strength, you can even add fabric glue underneath the patch before sewing. Make sure your stitches are tight and evenly spaced, as this will provide better reinforcement.
3. What type of patch is best for denim?
For denim, you’ll want a heavy-duty patch, such as a fabric or leather patch, to ensure it stands up to the weight and thickness of the material. Denim holds patches well, but it’s important to use a thick needle and polyester thread for added durability.
4. Can I remove a patch once it’s sewn on?
Technically, yes, but it’s not always easy. Removing a sewn-on patch can involve picking out the stitches one by one, which could damage the fabric. If you think you might want to remove the patch in the future, consider using fabric glue or iron-on patches for a less permanent solution.
Sew on Cloth Patches and Show Off Your Style!
Sewing on cloth patches is an incredibly fun way to add personality and flair to your wardrobe. Whether you’re adding a quirky patch to your favorite jacket, covering up a tear, or making a statement, this simple sewing technique can transform any garment. Plus, it’s a DIY project that lets you embrace your creativity and make your clothes truly one-of-a-kind.
So, grab a needle, pick your patches, and get sewing! You’ll not only love the results, but you’ll also enjoy the process. Don’t be afraid to experiment with different designs and placements. Remember, the beauty of sew-on cloth patches is that there are no rules—just your personal style shining through.